Long-term care (LTC) targets on people who lack of ability to carry out activities of daily living due to disease or cognitive impairment. The populations, especially those who are on prolonged bed rest, are at risk of a number of contradictions. Implementing range of motion (ROM) exercise can improve blood circulations, reduce joint stiffness, prevent contractures, deformation and the other contradictions. It also helps the long-term caregivers. There are many benefits of doing active ROM exercise, such as improving muscle power of limbs, improving cardiopulmonary function and enable active muscle stretching.
The Ministry of Health and Welfare has been promoting long-term care service these years. The service also includes ROM exercise. Therefore, we hope that through the demonstrations in the videos, nurse aides and caregivers are able to understand the steps and skills of ROM exercise, being alert of the precautions and able to deal with unexpected circumstances, thereby improve the quality of care and reduce accidents happen.
Applicable Objects for Range Of Motion (ROM) Exercise
The range of motion (ROM) exercise are mainly used to help patients who is on prolonged bed rest and patients who are unable to move their joints due to diseases, in order to reduce joint stiffness.
- Applicable to:
Patients with cerebrovascular accident (CVA), traumatic brain injury (TBI), spinal cord injury (SCI) patients - Not applicable to:
Patients who is in the acute stage of rheumatoid arthritis (RA), spine or limb joint instability, bone metastasis, unhealed fractures, open wounds in the joints, etc.
The Principles of Range of Motion (ROM) Exercise
- Patients are encouraged to carry out the movements on their own as much as possible if they’re capable to.
- While performing the passive ROM exercise, the proximal joint should be fixed and the distal joint should be moved gently
- Maximize the angle of ROM without causing pain
- Try staying at the maximum angle for 10~15 seconds
- Perform each movement for 5-10 times per set, 3-5 sets a day
- Postoperative patients should avoid overstressing the repair during the healing process on the wound or fracture while carrying out ROM exercise. Lines, tubes and
- drains should also be aware of during the process.
Precautions before having Range of Motion (ROM) Exercise
- Avoid carrying out the exercise 30 minutes before and after eating/feeding.
- Carry out the movements after instructions are given by healthcare professionals.
- Make sure that the patient has no redness, swelling, heat, pain or wounds on their limbs; if in doubt, please refer to the healthcare professionals.
- In order for the patients to be prepared and feel respected, informed consent should be done before making physical contact to avoid any unnecessary trouble.
- You may apply a heat compress by putting a warm towel onto the muscles near the joints for about 10 to 20 minutes, except for the following situations:
- Patients who have insufficient cognitive ability or unable to follow instructions.
- Patients who have poor endurance and high sensitivity to temperature changes.
- Patients with trauma for not over 48 hours, as warm compress may accelerate bleeding and swelling.
- When there is a malignant tumor in the affected area, heat compress will promote blood circulation and enforce cells division, thereby accelerating swelling and malignant metastasis.
- Patients with poor circulatory function, such as peripheral blood disease, diabetes, heart disease and high blood pressure.
- Patients with bleeding disorders.
- Patients with acute inflammation, dermatitis, venous thrombosis, newly healed skin, and loss of sensitivity to hot and cold (caused by diabetes, nerve damage, paraesthesia, etc.).
- The practitioner should control the force appropriately while observing the patient’s reaction and the changes in skin color, body temperature, facial expression, vital signs, etc.
- If patient feels discomfort, have limited joint range of motion, unusually high muscle tone, difficulty in execution or others abnormalities are noticed, you should stop your movement immediately and refer to a healthcare professional.
How long does it take to carry out a set of ROM exercise?
According to the manual provided by the Ministry of Health and Welfare:
- The combination includes: passive ROM of upper and lower limbs, active ROM is encouraged for those who need long-term care.
- The ROM exercise varies in different cases. It may take longer to assist patient doing passive ROM, while the time taken to supervise active ROM may be shorter. This implementation should be completed according to the patient’s situation.
Shoulder Flexion
- Hold the patient’s upper arm (near shoulder joint) with one hand. With the other hand, holds the patient’s forearm near the wrist.
- Turn the palm inward, facing the body, keep the elbow relatively straight and raise the arm closer to the ears.
- Patient’s condition is considered while raising his/her arm from the side of the body over the head, until slight stiffness occurs.
Shoulder Horizontal Adduction
- Hold the patient’s upper arm (near elbow joint) with one hand. With the other hand, holds the patient’s forearm near the wrist.
- Turn the palm inward, facing the body, raise the shoulder joint to 90 degrees, flex/bend elbow joint to 90 degrees, flex/bend the whole upper limb towards the body up to 90 degrees.
- Hold the patient’s upper limb closer to the opposite side, so that the palm approaches the opposite shoulder until slight stiffness occurs.
Shoulder Abduction
- Hold the patient’s upper arm near the elbow joint with one hand, place the other hand on the forearm that close to the wrist.
- Turn the palm inward, facing the body at the beginning. Raise the arm outward to shoulder height. Turn the palm facing the front of patient, then continue raising it closer to the ears.
- Patient’s condition is considered while moving his/her arm, until slight stiffness occurs.
Shoulder Internal/ External Rotation
- Abduct the shoulder joint to 90 degrees (raise the arm outward to shoulder height) and flex the elbow joint to 90 degrees.
- Place one hand under the elbow. With the other hand, hold the forearm near the wrist.
- Turn the palm inward, facing the body. Holding the elbow joint, turn the arm so that the hand points towards head up to 80 degrees (near the ears). Then turn arm back down so that hand points towardsthe feet up to 80 degrees (almost the same level with the chest).
- Patient’s condition is considered while the upper arm is twisting in the shoulder joint, until slight stiffness occurs.
Elbow Flexion/ Extension
- Raise the client’s arms outwards (shoulder abduction) by 30 degrees.
- Place one hand under the elbow. With the other hand, hold the wrist.
- Turn the palm inward, facing the body. Holding the elbow joint, flex/bend the arm towards the head (the palm is approaching head). Flex/bend the elbow up to 120 degrees, where the forearm touches upper arm.
- Patient’s condition is considered while flexing the elbow, until slight stiffness occurs.
Forearm Supination/ Pronation
- Raise the client’s arms outwards (shoulder abduction) by 30 degrees. Slightly flex/bend the elbow to enable further movement.
- Place one hand under the elbow. With the other hand, hold the wrist.
- Supination: Rotate the wrist so that the palm faces the head, hold for 10 seconds.
- Pronation: Rotate the wrist so that the palm faces the feet, hold for 10 seconds.
Wrist Rotation
- Raise the client’s arms outwards (shoulder abduction) by 30 degrees. Slightly flex the elbow to enable further movement.
- Hold the forearm above the wrist with one hand. Grasp the palm or fingers with the other hand.
- Slowly rotate the wrist clockwise.
- Slowly rotate the wrist anticlockwise.
Finger MP Joint Flexion/ Extension
- Hold the wrist joint with one hand and the distal end of the thumb with the other hand.
- Flex/bend the thumb toward the and hold for 10 seconds.
- Extend/straighten the thumb toward the back of the hand, and hold for 10 seconds
- Apply the same joint movement to index finger, middle finger, ring finger, and little finger according to the demonstration.
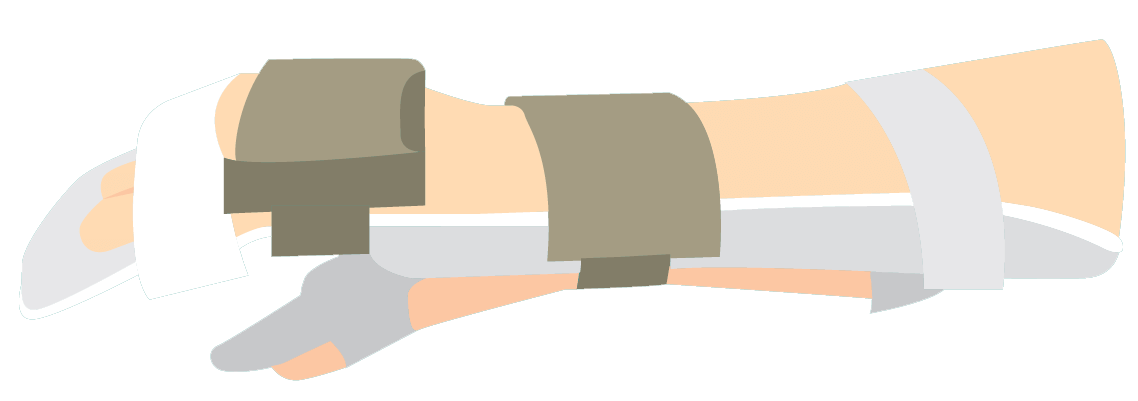
By having these wrist and finger ROM exercise,the efficacy of splint might be increased.

Hip Flexion/ Extension
- Cradle the leg by grasping the patient’s proximal calf (or knee pit) with one hand. Place the other hand under the distal calf (or ankle). Stand close to the edge of the bed and lunge.
- Shifting the center of gravity of your body forward, flex/bend the patient’s knee toward his/her head, until slight stiffness occurs.
- Shifting back the center of gravity of your body, extend/straighten the patient’s knee back to the original position.
Hip Abduction
- Cradle the leg by grasping the patient’s distal thigh (or knee pit) with one hand. Place the other hand under the distal (or ankle). Gently lift his/her leg off the bed.
- Abduct/pull the leg to the outward, while taking a step back at the same time. Keep doing until slight stiffness occurs in the hip joint.
- Adduct/push the legs inward, while taking a step forward at the same time. Bring the leg back to the other leg.
Hip Rotation
- Hold the patient’s heel with one hand, place the other hand under the knee (proximal calf). Bend/flex the hip joints and knee joints to a 90-degree position.
- Hold the knee joint with the hand still, slowly rotate the calf outward until stiffness occurs. Then rotate back return to the original position.
- Hold the knee joint with the hand still, slowly rotate the calf inward until stiffness occurs. Then rotate back return to the original position.
Ankle Stretching
- Hold the heel with one hand as if letting the foot to step on it. With the other hand, hold the part of shin that is just below the knee to keep the knee straight.
- Slowly press down the sole toward patient’s body, as stiffness will gradually increase.
- Hold for 10 seconds as stiffness occurs, then slowly return to the original position.
Ankle Rotation
- Elevate the foot with a towel or a pillow to avoid friction with the bed surface during movements.
- Hold the knee (proximal calf) with one hand, hold the front third of the foot with the other hand.
- Rotate the foot counterclockwise.
- Rotate the foot clockwise.
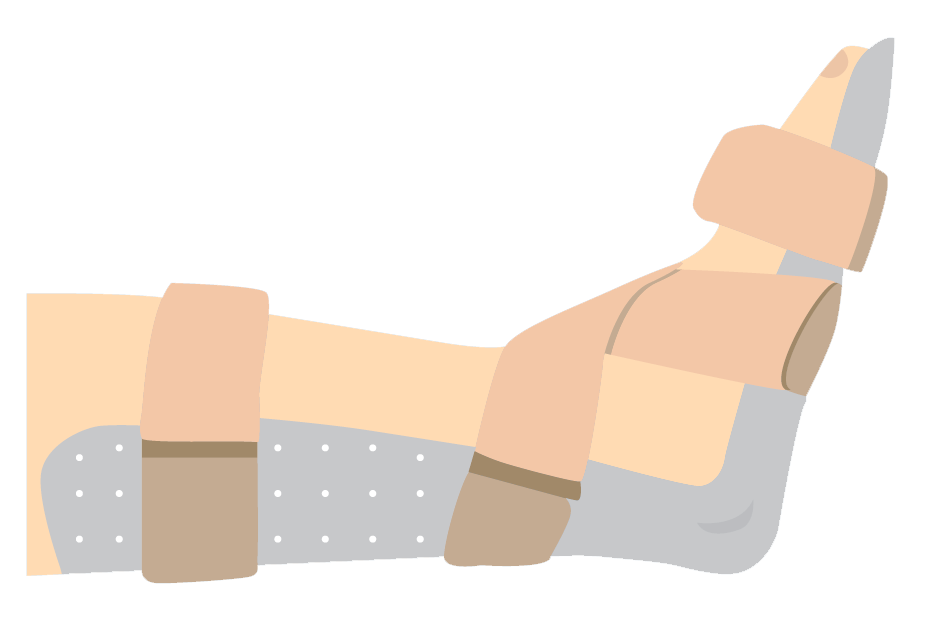
Wearable posterior AFO can maintain a good joint position and extend the effect of joint movement exercise.

Hallux and Toe MP Flexion/ Extension
- Hold the foot with one hand and grasp the toes with the other hand.
- Slowly bend the toes toward the sole of the foot.
- Slowly straighten the toes toward the top of foot.
